Although HawkSoft was not specifically designed for tracking employee benefits, there are still ways to enter the information in HawkSoft. Documenting this information in HawkSoft allows employees to rapidly respond to questions and look up information easily. It also allows you to run reports such as an expiration list on these policies.
The first step is to set up your employee benefits companies in the Policy/Company Setup area. We recommend creating a separate company for medical, dental and vision (e.g. Anthem – Medical, Anthem – Dental, Anthem – Vision all set up as separate companies) This allows you to create custom coverages for each line of business. These coverages are prompts to enter policy specific information. A sample of recommended coverages/prompts for medical, dental and vision are included in this document.
Once the setup is completed, you can document all of this information on individual group benefit policies by adding a policy to the client and selecting a Policy Title of Medical, Dental or Vision and then completing the coverages prompts.
The steps for setting this up are documented under the heading for Medical, but the steps will be the same for Dental and Vision, it’s just a matter of adding different coverages.
Setting Up the Companies with Coverages/Prompts
Medical
1. Go to the gear button in the upper right corner of HawkSoft and select Policy/Company Setup.
2. Go to the Commercial/All Other.
3. Click the New button to add a new company.
4. In Unique Name, enter the name of the company followed by the word Medical (e.g. Anthem – Medical). If Anthem also provided vision coverage, you would add a new company for that called Anthem – Vision.
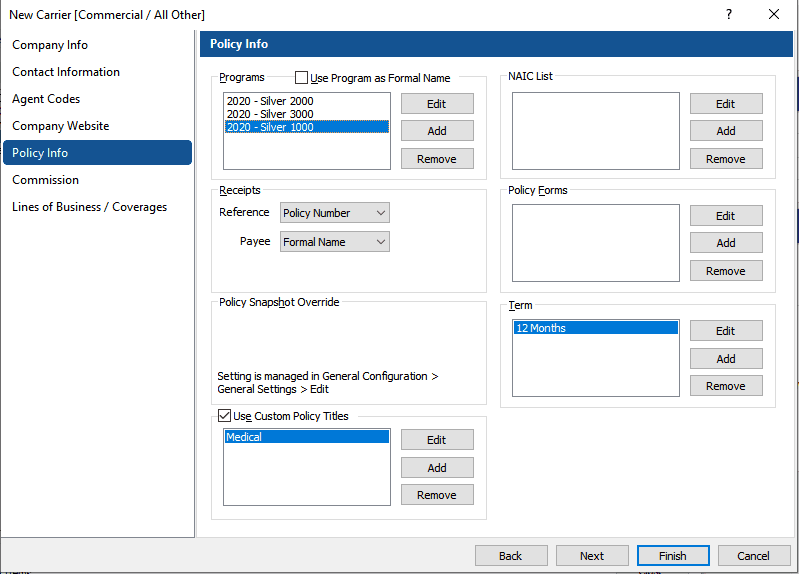
5. On the Policy Info tab, enter the names of the programs using the Add. We recommend entering them each year. Each year, you can add new plans and remove old plans (see example below):
2020 – Silver 1000
2020 – Silver 2000
2020 – Silver 3000
6. Place a check mark in Use Custom Policy Titles, then click the Add button and enter Medical as the Policy Title and click OK.
7. Under Term, click the Add button and enter 12 Months for the term and click OK.
8. Go to the Lines of Business/Coverages tab.
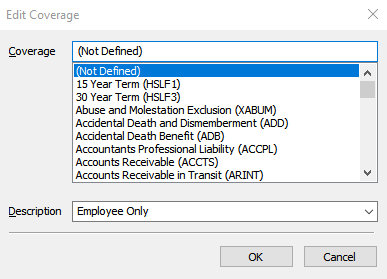
9. Under the Lines of Business/Coverages, double-click on (Enter new item here). This will open the Edit Coverages box and (Not Defined) is automatically highlighted.
10. Place your cursor in the Description box and type the description of the coverage and click OK.
11. Repeat this for the following items:
Employee Only
Employee + Spouse
Employee + Family
Employee + Child(ren)
12. Click the Add LOBs button, place a check mark next to HEALTH and click OK.
13. Double-click on (Enter new item here). This will open the Edit Coverages box and (Not Defined) is automatically highlighted.
14. Place your cursor in the Description box and type the description of the coverage and click OK.
15. On the right-hand side of the screen, you can enter default amounts under either limits or deductibles by double-clicking on (Enter new item here).
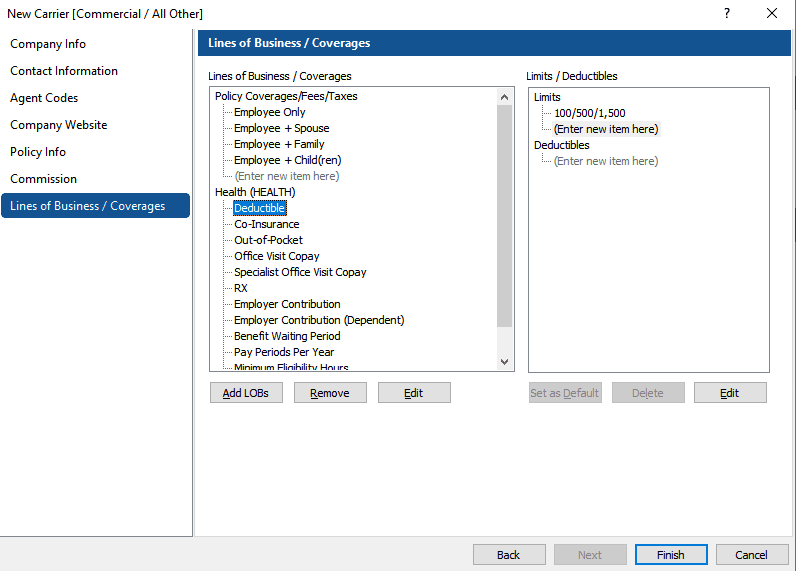
16. Continue to add the additional Medical specific coverages to the Health Line of Business. This list is by no means exhaustive. We recommend working with your staff to determine if additional fields are needed or if you feel some of these fields are unnecessary. It’s a good idea to review the list annually to make adjustments.
Health (HEALTH)
Deductible
Co-Insurance
Out of Pocket
Office Visit Copay
Specialist Office Visit Copay
RX
Employer Contribution
Employer Contribution (Dependent)
Benefit Waiting Period
Pay Periods Per Year
Minimum Eligibility Hours
Now that you know the steps, you can apply them to both Dental and Medical companies/coverages.
Dental
Policy Info
Programs
(List out each policy type)
Checkmark “Use Custom Policy Titles”
Add “Dental”
Term
Add 12 Months
Lines of Business/Coverages
Policy Coverages/Fees/Taxes
Employee Only
Employee + Spouse
Employee + Family
Employee + Child(ren)
Health (HEALTH)
Deductible
Max Benefit
Preventative Services
Basic Services
Major Services
Orthodontia
Employer Contribution
Employer Contribution (Dependent)
Benefit Waiting Period
Pay Periods Per Year
Minimum Eligibility Hours
Vision
Policy Info
Programs
(List out each policy type)
Checkmark “Use Custom Policy Titles”
Add “Vision”
Term
Add 12 Months
Lines of Business/Coverages
Policy Coverages/Fees/Taxes
Employee Only
Employee + Spouse
Employee + Family
Employee + Child(ren)
Health (HEALTH)
Vision
Exams/Lens/Frames Interval
Exam, Test, and Hardware
Vision Exam Copay
Lenses
Frames
Contacts
Employer Contribution
Employer Contribution (Dependent)
Benefit Waiting Period
Pay Periods Per Year
Minimum Eligibility Hours
Completing the Policy on a Client Screen
- Add the policy as you would any new policy selecting Health as the type of policy.
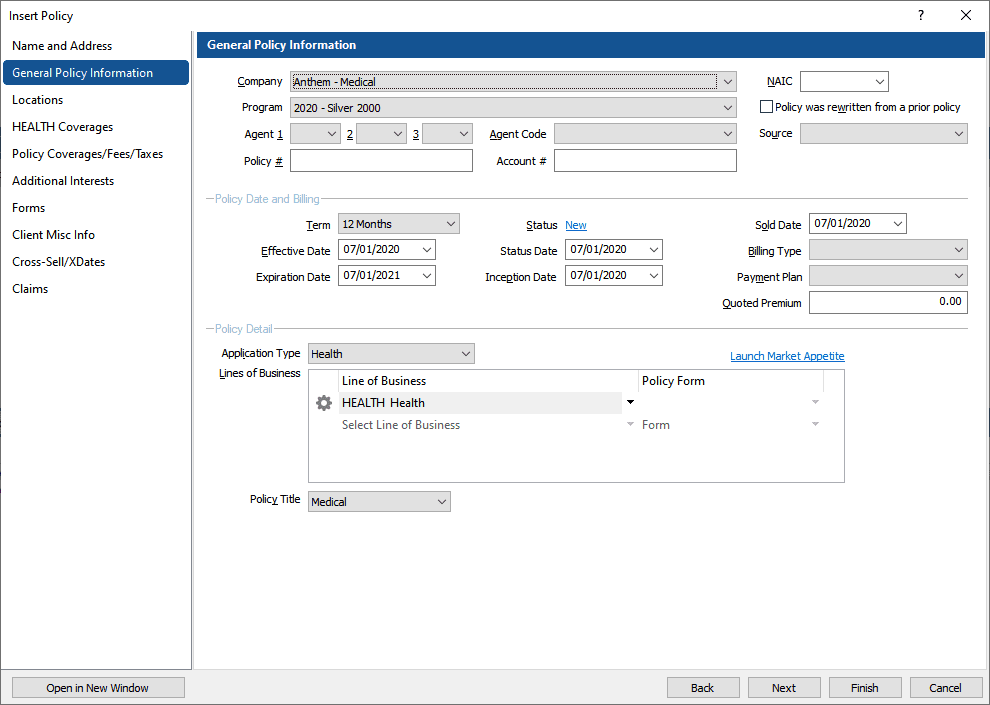
- On the General Policy Information page, select the company, program, enter the effective and expiration date.
- Under Lines of Business, select HEALTH.
- In the Policy Title, select Medical, Dental or Vision as appropriate. This is what will define the type of policy on the client main screen.
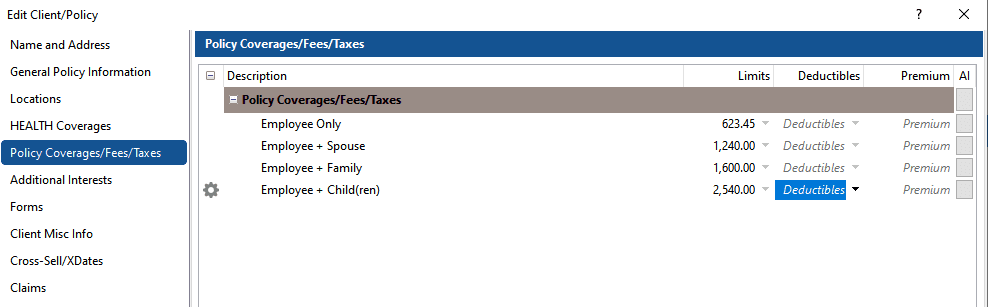
5. Go to the Policy Coverages/Fees/Taxes tab, enter the cost of Employee Only, Employee + Spouse, Employee + Family, Employee + Child(ren)
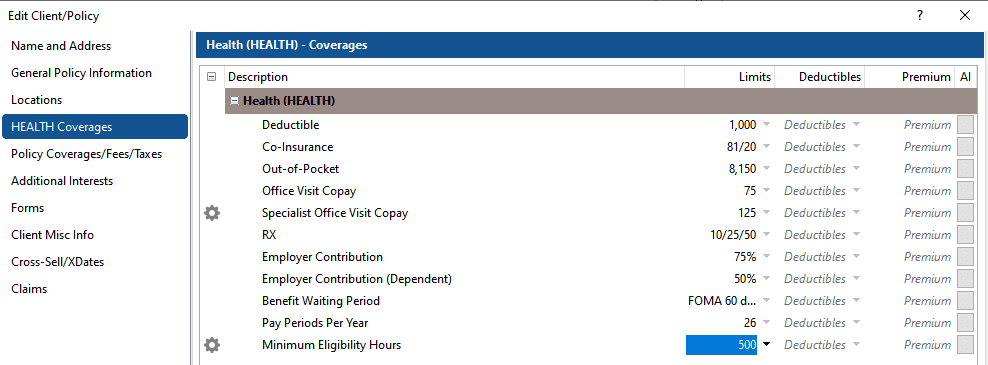
6. Go to the Health Coverages tab (if this is not visible, you did not select HEALTH as the line of business on the General Policy Info tab.
7. Enter the amounts/data for each field in either the limits or deductible fields depending on your agency preference. It can be selected from the drop-down list if you entered it in the Policy/Company Info or typed in manually.
8. Click Finish to save and exit.
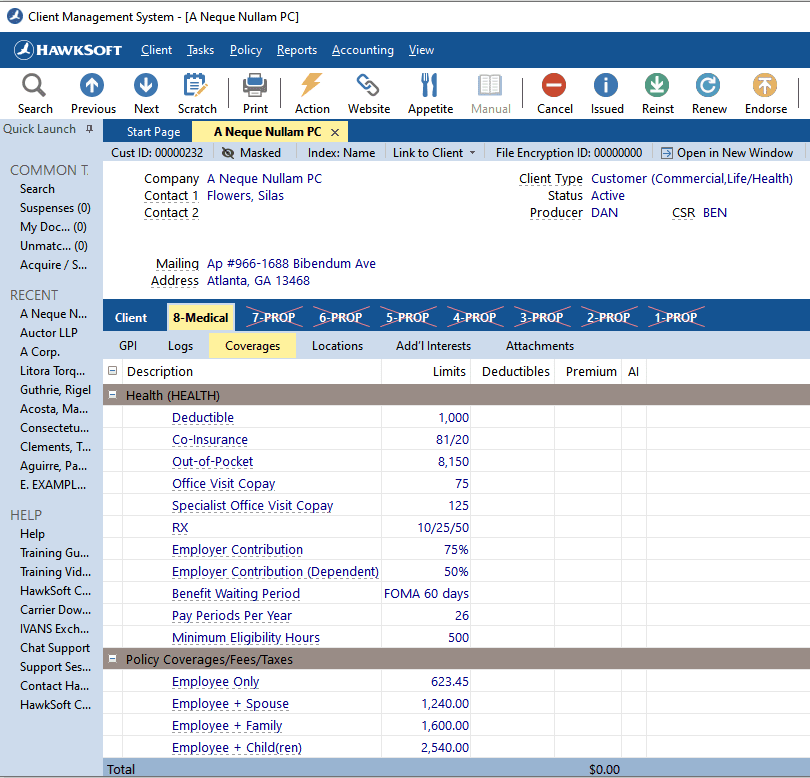
Adding the information in this way, allows you to see all of it at a glance directly from the Client Screen by clicking on the Policy and then clicking on the Coverages tab.
(Note: Graphic below is from a SAMPLE database, not live)
Thank you to HUG member, Lynnette Wood. She presented a webinar June 2020 to HUG members interested in using HawkSoft for employee benefits. In lieu of no recording, this blog/process summary was prepared with the help of Jennifer Thompson (HUG organization). Thank you Lynnette and Jennifer!

Lynnette Wood
Aurora National Insurance
Anchorage, Alaska
