First and foremost, I want to be clear this is NOT a blog on E&O. It is merely how we use Hawksoft CMS to process Certificates of Insurance in our agency. Since our agency is mostly commercial in nature, certificates are a daily routine. There isn’t a day that goes by where we don’t do certificates. Getting it done quickly and getting it done right is important. Taking the time set up your certificates process efficiently will benefit your agency. Our goal is to allow the function to be as automated as possible. As a general rule, a properly prepared “general” certificate (one without special conditions or wording) can be issued by anyone in the office.
CREATE A MASTER CERTIFICATE
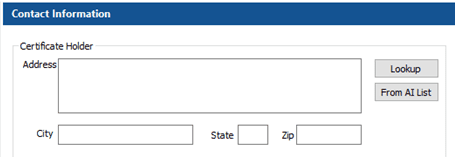
The first step for our agency is to create the MASTER certificate from the action menu. We make one for every contractor in our office the day the policy is bound. Why? We know a COI will be issued at some point during a policy year. We verify policy numbers and limits in the corresponding areas. In our agency, ALL certificates are created from the CLIENT tab.
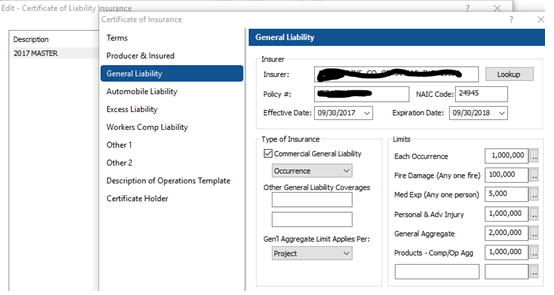
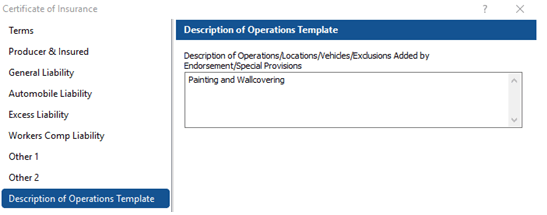
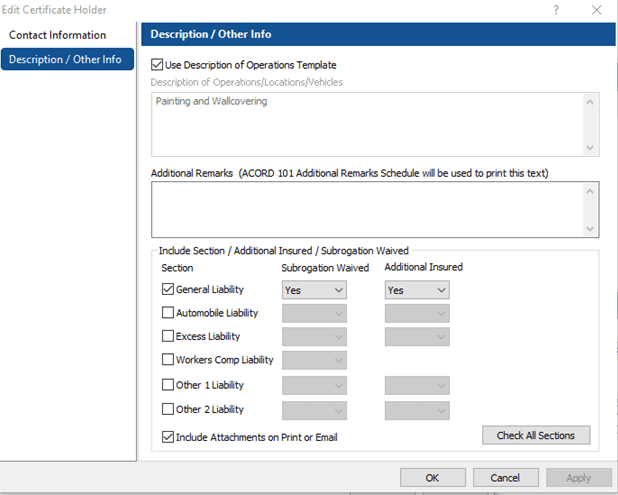
After all limits have been entered, we complete the general Description of Operations Template. Keep in mind that this is the MASTER certificate and can be change as needed when certificates are issued.
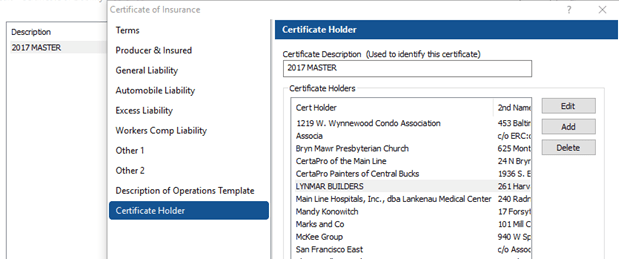
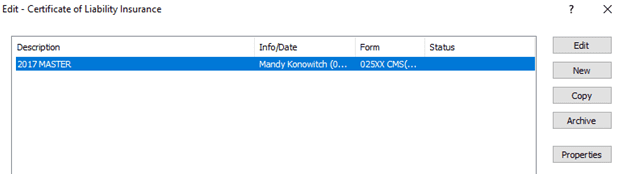
Finally, we name our Master certificate. In the Certificate Holder section, type the name of the certificate in the Certificate Description field. In this case, 2017 Master.
LOAD YOUR CERTIFICATE HOLDER DATABASE
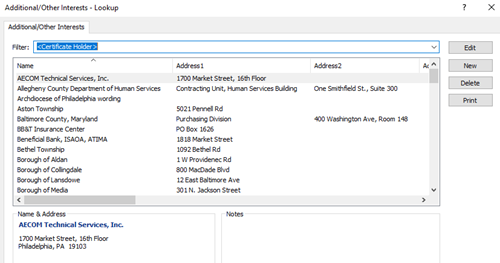
The next step in our workflow is making sure we have a good database of certificate holders. When we started using HawkSoft, we added as many townships and municipalities as we knew by going to the Gear icon (top right corner of main screen)-> Additional / Other Interests / Certificate Holders Database screen. The key to a great automated system is keeping this list as accurate and up-to-date as possible. We do so by using the “lookup” feature within the certificate. When the insured calls or emails us a new certificate request, we FIRST check via lookup to verify it is in our database.
Clicking the Lookup button takes you to a searchable list from your Certificate Holders Database. Begin typing the name of the certificate holder in the filter. If you see the name, highlight it, and hit OK. The information will pre-fill into your certificate. If it is not in your database, hit New and you can now add another cert holder to your list for everyone to use. When complete, click OK and it will now be on your certificate. And lastly, if the information has changed, this is the time to verify what is accurate and make any necessary changes using the Edit button.
A Master certificate is now ready for anyone to use. Note that Use Description of Operations Template is check marked. It is greyed out and cannot be changed without unchecking the description box. If a certificate must have special wording, just uncheck the box and type away.
Creating a good Master template and having strong, accurate certificate holder database is critical to having a streamlined and accurate certificate workflow. What about the exceptions to the “Master?” The “Master” is your building block.
ADDING DOCUMENTS TO A CERTIFICATE
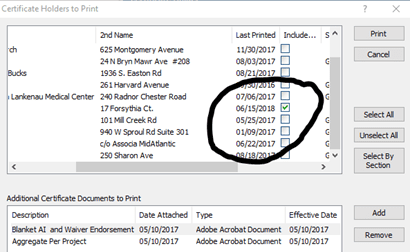
More often than not, a certificate holder will ask for copies of specific endorsements to accompany the certificate such as additional insured endorsements, waivers of subrogation, primary non-contributory wording and other specific requests. We go through the policy/policies in question and print the pages via the HawkSoft Virtual Printer. We add these pages to the Client tab as attachments. To add them to the certificate, when you print or email a certificate, click the Add button in the Additional Certificate Documents to Print area below the list of Certificate Holders.

NOTE: Once you add the documents, all certs will get a copy of them by default. You must uncheck the Include Attachments check box next to each certificate holder that should NOT receive the attachments.
Our agency emails or occasionally faxes ALL certificates. We have two email templates, one for sending the certificate to the certificate holder with a the insured cc’d and the other template which is used to send the certificate to the insured only. To make emailing easy, it’s also important that you have digital signatures set up for ACORD documents. If you need help with this, search CMS help for User Signature Setup.
Renewals are straightforward. We send the insured a copy of the certificate list for revision. We ask our insured to review the list and update the list. When the updated list is returned, begin the process by copying the previous master (use the Copy button in the screen below).
Once copied, just edit the policies for the new dates. When we email the renewal certificates it can be a little cumbersome. Currently, there are 3 options that can be chosen: Insured, One email per certificate holder and One email with all documents. Unfortunately, the second option does not act as a mail merge and send each one out automatically. If you have a lot of certificates to renewal, it can be a little cumbersome as you have to manually hit enter after each certificate until all certificates are complete.
Overall, we find our workflow works well for us. If you have any suggestions make them in the HawkSoft Community forum. If you want the developers to act on it, let fellow users know about recommendation so they can vote on it.
Thomas McKee
Thomas McKee Agency, Ltd.
Havertown, PA
thomas.m.mckee@mckeeinsures.com
Phone: (484) 451-8883
